Drying flowers at home is one of those satisfying projects that’s simpler than it sounds and more rewarding than you’d expect. Whether you’ve got garden roses you want to preserve, a wedding bouquet you can’t bear to throw away, or you just want to turn a supermarket bunch into something that lasts, the process is straightforward — and the results can be genuinely beautiful.
Here are the best methods for drying flowers at home, what works well, and a few things to avoid.
Air Drying — The Simplest Method
This is the most traditional approach, and for most flowers, it’s all you need.
How to do it: Strip the lower leaves from your stems, gather them into small bundles of five to ten stems, secure with twine or a rubber band, and hang them upside down in a warm, dry, well-ventilated spot. An airing cupboard, spare bedroom, or covered porch works perfectly. Avoid anywhere with high humidity — kitchens and bathrooms are out.
How long it takes: One to three weeks depending on the flower type, stem thickness, and humidity levels. They’re done when the stems snap cleanly rather than bending, and the petals feel papery and dry to the touch.
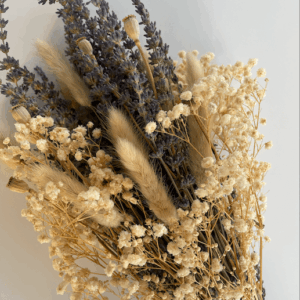
Best flowers for air drying: Lavender, roses, hydrangea, statice, baby’s breath (gypsophila), strawflowers (helichrysum), wheat, oats, pampas grass, and most ornamental grasses.
Pro tip: Hang bundles away from direct sunlight. UV light fades colours during the drying process, so a dark or dimly lit space gives you the richest, most vibrant results.
Silica Gel Drying — For Preserving Shape and Colour
If you want dried flowers that retain their original shape and colour as closely as possible, silica gel is the method to use. It’s particularly good for flowers with complex, multi-petalled heads — like peonies, dahlias, and garden roses — that tend to lose their shape when air-dried.
How to do it: Pour a layer of silica gel crystals into an airtight container. Place the flower head face-up on the gel, then gently spoon more gel around and over the petals until the flower is completely covered. Seal the container and leave for three to seven days.
How long it takes: Three to seven days. Check by gently brushing away some gel — the petals should feel papery and dry. If they still feel flexible, reseal and wait another day or two.
Where to get silica gel: Craft shops, Amazon, and some garden centres sell flower-drying silica gel in reusable tubs. It’s not the same as the small sachets you find in shoe boxes — you need the loose granules.
Pressing — For Flat Flowers and Crafts
Pressing flowers is a different approach entirely — rather than preserving their three-dimensional shape, you flatten them into delicate, translucent specimens that work beautifully for framing, card-making, resin art, and bookmarks.
How to do it: Place flowers between two sheets of parchment paper, then press them inside a heavy book or a dedicated flower press. Stack additional books on top for extra weight. Leave for two to four weeks.
Best flowers for pressing: Pansies, daisies, ferns, cosmos, and any flower with a relatively flat, single-layer structure. Thick, bulky flowers like roses don’t press well whole — but individual petals press beautifully.
Microwave Drying — The Quick Method
If patience isn’t your strong suit, microwave drying with silica gel can reduce the process from days to minutes. Place flowers in a microwave-safe container with silica gel, microwave on medium power in 30-second bursts, checking between each burst. The whole process takes two to four minutes.
The trade-off is that results are less predictable — it’s easy to overcook delicate petals. This method works best as an experiment rather than for flowers you really care about preserving perfectly.
Common Mistakes to Avoid
Starting with flowers that are too far gone. Dry flowers when they’re at their peak or just past it — not when they’re already wilting and browning. The drying process preserves whatever state the flower is in, so start with the best material possible.
Making bundles too thick. Large, dense bundles trap moisture in the centre, which leads to mould rather than drying. Keep bundles to five to ten stems maximum, and make sure air can circulate around each one.
Drying in humid rooms. The bathroom and kitchen are the worst places for drying flowers. You need warm, dry air with good ventilation. A spare room with a window cracked open is ideal.
Expecting them to look like fresh flowers. Dried flowers change — colours shift, petals shrink, shapes evolve. That’s not a failure; it’s the point. Embrace the muted, textured, naturally aged aesthetic.
What to Do with Your Dried Flowers
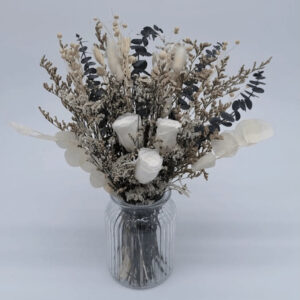
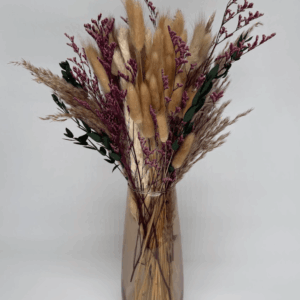
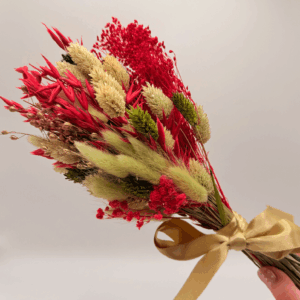
Once dried, the possibilities are wide open. Arrange them in a vase for a home display, weave them into wreaths, use them in wedding décor, make sachets with the petals, or press them into frames as wall art.
If the DIY route isn’t for you, our ready-made dried flower arrangements arrive already styled and ready to display — professionally dried, beautifully arranged, and designed to last for years.
Once you’ve mastered drying your own flowers, complement them with a ready-made arrangement from our collection. Our hand-tied bouquets and bud vases make a perfect starting point for mixing your home-dried stems with professionally arranged pieces.